Showing posts with label Upcycled. Show all posts

Thursday, 1 March 2018

Room Divider Upcycled

Welcome,

Friends asked me to upcycle their room divider as their Christmas gift. 

I delivered it to them on Minday so I can share it with you now!

I forgot to take a proper before photo, but I snapped this one just before taking it apart. It was varnished pine with calico curtains.


First I sanded the frames back, with my helpers for moral support.


You wouldn't imagine that would be the most relaxing place to be with the sander going!


I whitewashed the frame and boy, that old pine soaked up way more paint than I thought it would!


I made new curtains with a teal voile. Voile was perfect for this project as the colour is on both sides of the fabric so it looks the great on both sides.


I am happy with how it turned out. It's always nerve wracking making something for someone else, especially when they asked you to do it and therefore have preconceived expectations!


I'm glad to say that they were happy with the finished product ... phew!

Thanks for popping by
Vicki

Sunday, 21 June 2015

Recycled Denim Dog Blankets - A Finished Project

Welcome,

The total of my weekend sewing are a couple of recycled denim dog blankets:

Recycled Denim Dog Blankets
Not great pictures I'm afraid, I took them this morning after they'd been slept on!


Recycled Denim Dog Blankets
Each top has been made from a patchwork of 3 x trouser legs opened up
Recycled Denim Dog Blanket 
And the back of each is 2 layers of an old fleece blanket that is no longer used. 

A simple sew around inside out and then turned in the right way with a simple line of stitches around the edge.

Now all of the family members have our own denim blanket. You can read about hubby's here, and mine here.


Floyd, showing off his new recycled denim blanket

Floyd was kind enough to model his, but he wouldn't let Gretle model hers - little brothers can be like that!!

Thank you for popping by
Vicki

Friday, 19 December 2014

My Second Denim Quilt - A finished project

Welcome!

After making the denim quilt for hubby, I blogged about it here, I knew I wanted to try another.  Something a little more traditional, yet still a little querky.


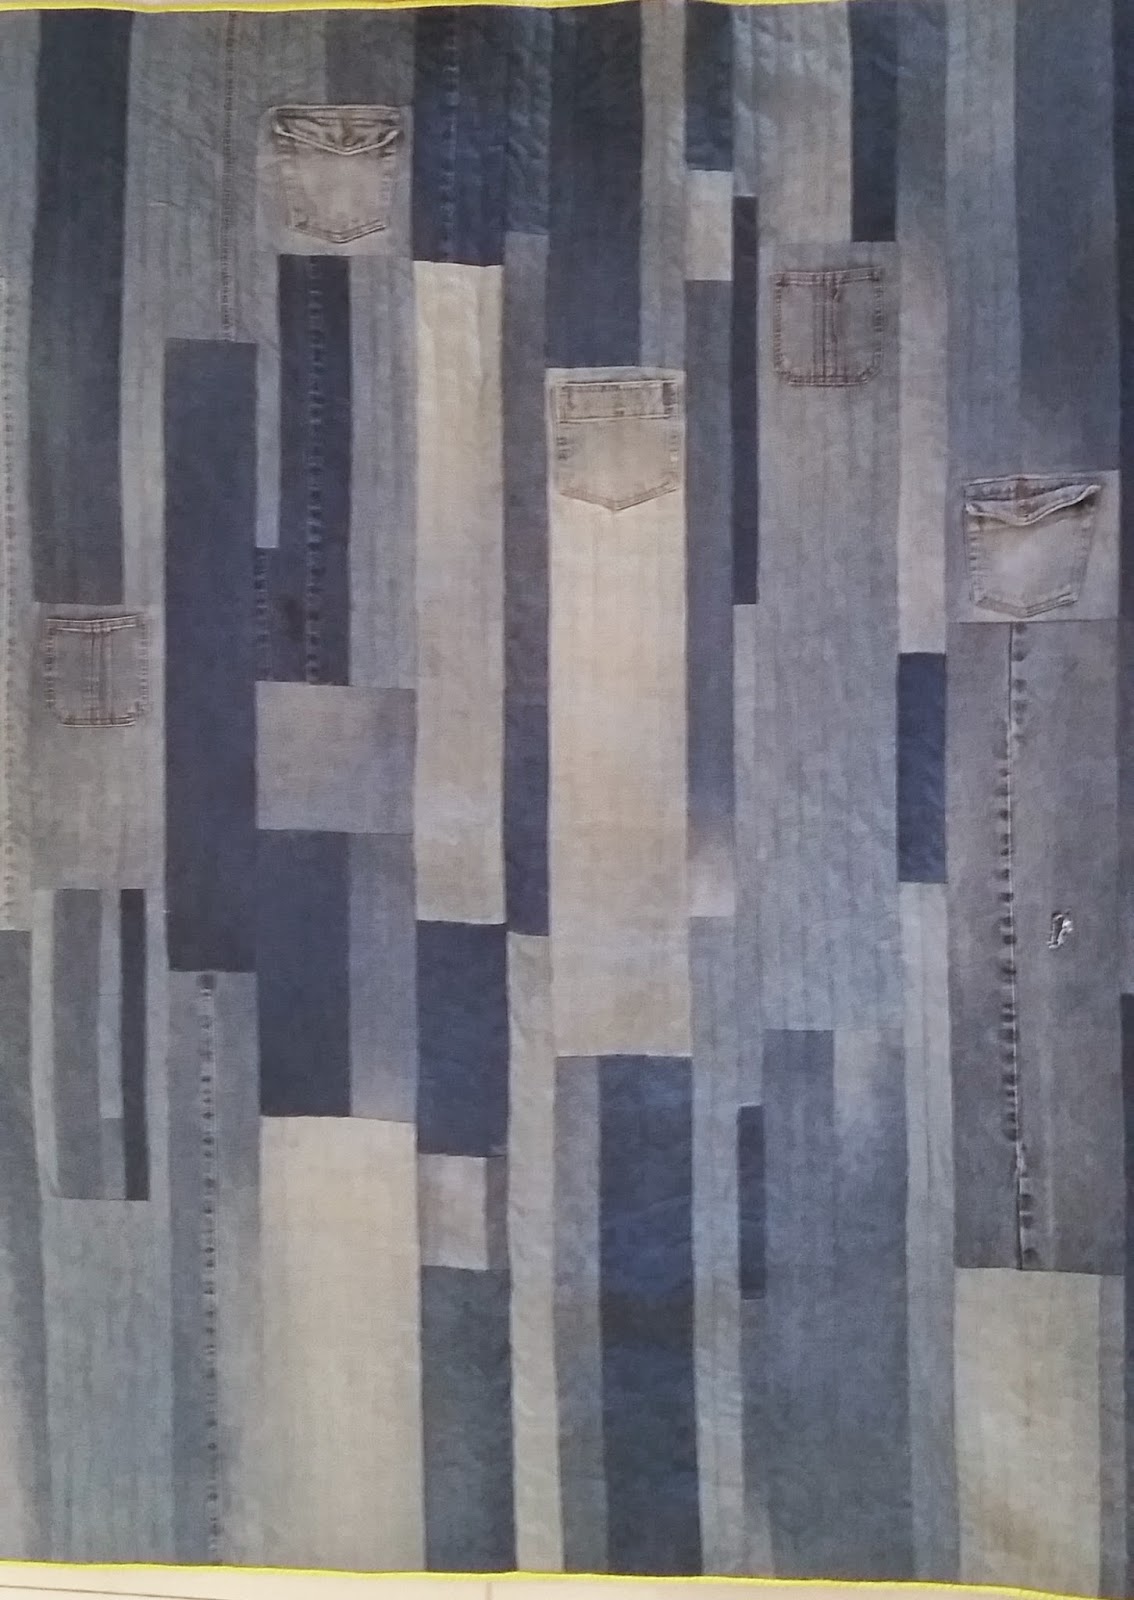
Denim Strip Quilt

So here is it is!  It still has pockets to hide things in, and is also made from those old jeans (and a skirt) that were past their use by date, the ones that can only be sent to landfill.


After the first learning experience I ensured I had a nice flat surface to work with.

I don't have any progress pictures but I will briefly outline how I did this so that you can make one too.

After gathering some old pairs of jeans I started by cutting strips, as long as possible, with varying widths: 1.5, 2.5, 3.5, 4.5, 5.5 and 6.5 inches.


I cut the wider strips first and incorporated the pockets, As you can see in the picture above I also cut strips that included the seams in the jeans.

I kept all of the pockets the same way around and toward one end of the quilt - my theory was that if it was a cold night and I needed the remote and a snack nearby I needed to be able to reach the pockets!


I then started sewing strips together, narrower strips to match the width of wider strips and then length wise to make the length of the quilt I wanted.  Some of the pieced strips from top to bottom stay narrow whilst others create wider strips.

As I completed each strip I lay them out to ensure even colour dispersion and that the horizontal seams didn't all sit together. 
The above picture shows the quilt top before trimming.  I sewed each strip by squaring off one end of the quilt first and leaving the other end to be trimmed.


To finish this quilt I backed it with a gorgeous soft minky, used a 100% bamboo batting and quilted 1 inch lines.  To ensure all the pockets are still functional the quilting lines stop and start on either side of the pocket.

I bound it with a bright lime zig zag print which I think contrasts nicely.  It is however, the first and only time I have attempted machine binding - I usually do it by hand - and it is far from perfect hence no close ups there!

This has been finished for a while and was used regularly to snuggle under during the winter months - that minky is so soft and cuddly!

Thank you for popping by
Vicki

Sunday, 16 November 2014

My first ever quilt - a finished project


I am proud to share my first ever quilt with you.  I actually completed this about 18 months ago for my husband.  Since then I have made a number of quilts and quilted items which I'd also like to share with you, but you'll have to wait as I have decided to start at the beginning of the journey!


Hubby wears jeans for work and we have lots of pairs that are worn out so I decided to cut some up and sew them back together to make something useful.  As you can see I patched the jeans first before sewing them back together.  

These really couldn't have been re-used or sent to a second hand shop - they would have ended up in landfill ... I much prefer this use :)


I learnt A LOT during this process, one thing is that just opening up the legs of the jeans and sewing them back together does not make for a totally flat surface!  Also sewing through all these layers where the tops of the jeans are sewn together is HARD work for me and the machine - I have to confess that many needles were broken in the process of making this quilt!  

Useful information that certainly helped with my second denim quilt!


You can just see the quilting in the above picture - dual lines along the seams and another 3 sets up each side of the 'leg'.


I backed and bound this quilt with a microfibre sheet - this is a lovely soft backing and of course a little 'Handmade just for you' label.

I used a 100% bamboo batting - together the batting and denim top make for a very warm and heavy quilt.  

I am glad to announce that hubby loves it and uses it in winter.

I hope you will pop back and see some more of my sewing exploits in the near future.

Vicki