Tuesday 30 December 2014

Farmers Wife Quilt 2014 Instalment 1

Hi,

Like many, I started a Farmer's Wife  Daughter Quilt this year - I am the daughter of a farmer so have re-named mine.

The Farmer's Wife Sampler Quilt: Letters from 1920s farm wives and the 111 blocks they inspired


For those that don't know about this quilt, you can find the book here.  The letters are quite fascinating to read.  I am trying to read them as I complete the blocks.

I am piecing mine by hand using the English Paper Piecing (EPP) method and actually started it way back in February - thankfully I have been noting the date on the back of each as I complete them.

Here are the first 15 finished - beware, there are lots of pictures:

Farmer's Daughter Quilt Block 1 - Atic Windows
Completed 9th February 2014

Farmer's Daughter Quilt Block 2 - Autumn Tints
Completed 13th February 2014

Farmer's Daughter Quilt Block 3 - Basket
Completed 15th March 2014

Farmer's Daughter Quilt Block 4 - Basket Weave
Completed 16th February 2014
In general I have completed these in order, but that has not always been the case - I organise 5 blocks at a time into ziplock bags and occasionally they are completed out of order.  And there have been a couple where I haven't liked the fabric combinations once I have got the paper pieces basted so they have ended up in the bin and needed to be completed again.
Farmer's Daughter Quilt Block 5 - Bat Wing
Completed 19th February 2014

Farmer's Daughter Quilt Block 6- Big Dipper
Completed 23rd February 2014

Farmer's Daughter Quilt Block 7- Birds in the air
Completed 10th March 2014

Farmer's Daughter Quilt Block 8 - Bouquet
Completed 1st March 2014
 When I started this quilt I had a charm square pack of Aneela Hoey's 'Sew Stitchy' and I loved the colours (you can see a couple of these fabrics in the above block).  I took out the red and worked with the aqua, pink, green and grey plus the added orange.  I am working with a range of fabrics.  As I progress I buy more so you'll see the same fabrics show up in a few blocks and then not be seen again! Luckily they will be dispersed throughout the quilt top.
Farmer's Daughter Quilt Block 9 - Box
Completed 2nd March 2014

Farmer's Daughter Quilt Block 10 - Bowtie
Completed 2nd March 2014

Farmer's Daughter Quilt Block 11 - Broken Dishes
Completed 2nd March 2014

Farmer's Daughter Quilt Block 12 - Broken Sugar Bowl
Completed 15th March 2014

Farmer's Daughter Quilt Block 13 - Buckwheat
Completed March 2014

Farmer's Daughter Quilt Block 14 - Butterfly at the Crossroads
Completed 27th December 2014

Farmer's Daughter Quilt Block 15 - Buzzard's Roost
Completed 6th May 2014
As I have completed the blocks there have been some that I love and am really happy with and there are others that I think are a bit bright/in your face/gaudy, BUT when I see them all together and once there is white sashing I think they will all even each other out.
Farmer's Daughter Quilt Blocks 10-16
Farmer's Daughter Quilt Block 1-9

All in all I am liking what I have to date, however there are a lot of blocks and other pieces to go, I expect this project to take a while yet!

I have completed more blocks and I will update you again soon with all of the 2014 blocks completed, however I still have one in progress so I'd best get back to it!

Thank you for taking the time to see this progress,

Vicki


Sunday 28 December 2014

Christmas Pillowcases

Hello and Welcome

For Christmas I made pillowcases for some friends.  I would quite happily have kept these for myself had I not made them specially for these lovely ladies.


Each pillowcase is very different and I used some new-to-me techniques, and I love how they turned out!

Beware, this is going to be a long post ... I want to share as much as possible of these pillowcases.


~~~~~~~~~~~~~~~~~~~~~~~~~~~~~~~~~~~~~~~~~~~~~~~~~~~~~~~~~~~~~
Dream Low Volume Patchwork Pillowcase
The first is a simple patchwork with some embroidery.  This was chosen for M as she already has a gorgeous handmade quilt on her bed and I didn't want to try and coordinate and have it clash. 

To make the patchwork as low volume as possible, it's quite likely I committed a quilting crime - I actually used the reverse (wrong) side of the majority of fabrics.
Dream Low Volume Patchwork Pillowcase

I kept the quilting and embroidery as simple as possible so enable the pillowcase to work with the gorgeous quilt that M made rather than compete with it.  The quilting is a simple cross hatch working diagonally through the 2 inch finished squares.

I love how this turned out.  I've wanted to create a low volume quilt for my bed but wasn't happy with the fabrics I was pulling - now I know how great it can look I will definitely be putting it back on my to do list!

~~~~~~~~~~~~~~~~~~~~~~~~~~~~~~~~~~~~~~~~~~~~~~~~~~~~~~~~~~~~~
Triple Porthole Dragonfly Pillowcase

The second pillowcase for B was chosen because I knew that another friend is making a quilt made of predominantly purples with some teal, having not seen the fabrics I wanted to make choices that would coordinate.  I also know that she loves dragonflies, so this fabric was a no brainer.


Porthole close up
Porthole 2 Close up

The pillowcase was inspired by this gorgeous quilt by Lu Summers, I followed the basic tutorial that can be found here. I absolutely love how this turned out and will definitely see a quilt using this technique in my future.

I echo quilted around the circles with my walking foot, I love the texture this gives.
Triple Porthole zip detail
I added a zip to this one rather than the usual flap closure as I envisage B leaving this out during the day on her sofa and I wanted it to look like a cushion too!


~~~~~~~~~~~~~~~~~~~~~~~~~~~~~~~~~~~~~~~~~~~~~~~~~~~~~~~~~~~~~
Teal Impracticality Pillowcase
I love how this pillowcase for J turned out.  I used the impracticality tecqnique outlined by Angela Walters here.  This is the first time I have done anything remotely improvisational and I loved the process, though it did use a LOT of fabric.


Teal Impracticality Pillowcase - quilting detail
The texture from this technique is amazing, especially towards the centre where the pieces are all very small.
Teal Impracticality Pillowcase - quilting detail

 I free motion quilted this pillowcase.  I began by doing pebbles (circles) in some of the triangular rings in matching threads leaving some unquilted to add to the amazing texture.
Teal Impracticality Pillowcase - quilting detail
Once I got to the larger 'open' area I quilted spirals and pebbles. In the green band I quilted a loop-de-loop. I love this, the colours are amazing and the texture, believe me you need to touch it to believe it!
~~~~~~~~~~~~~~~~~~~~~~~~~~~~~~~~~~~~~~~~~~~~~~~~~~~~~~~~~~~~~

I finished these pillowcases Tuesday morning, just in time for lunch with these lovely ladies, I'm glad to say that they liked their gifts ... and their gift to me - sewing supplies, so you'll be seeing pin cushions and a bag in the near future!

I have linked this to Crazy Mom Quilts Finish it up Friday and
 Fresh Sewing Day


Thank you for popping by,
Vicki

Friday 19 December 2014

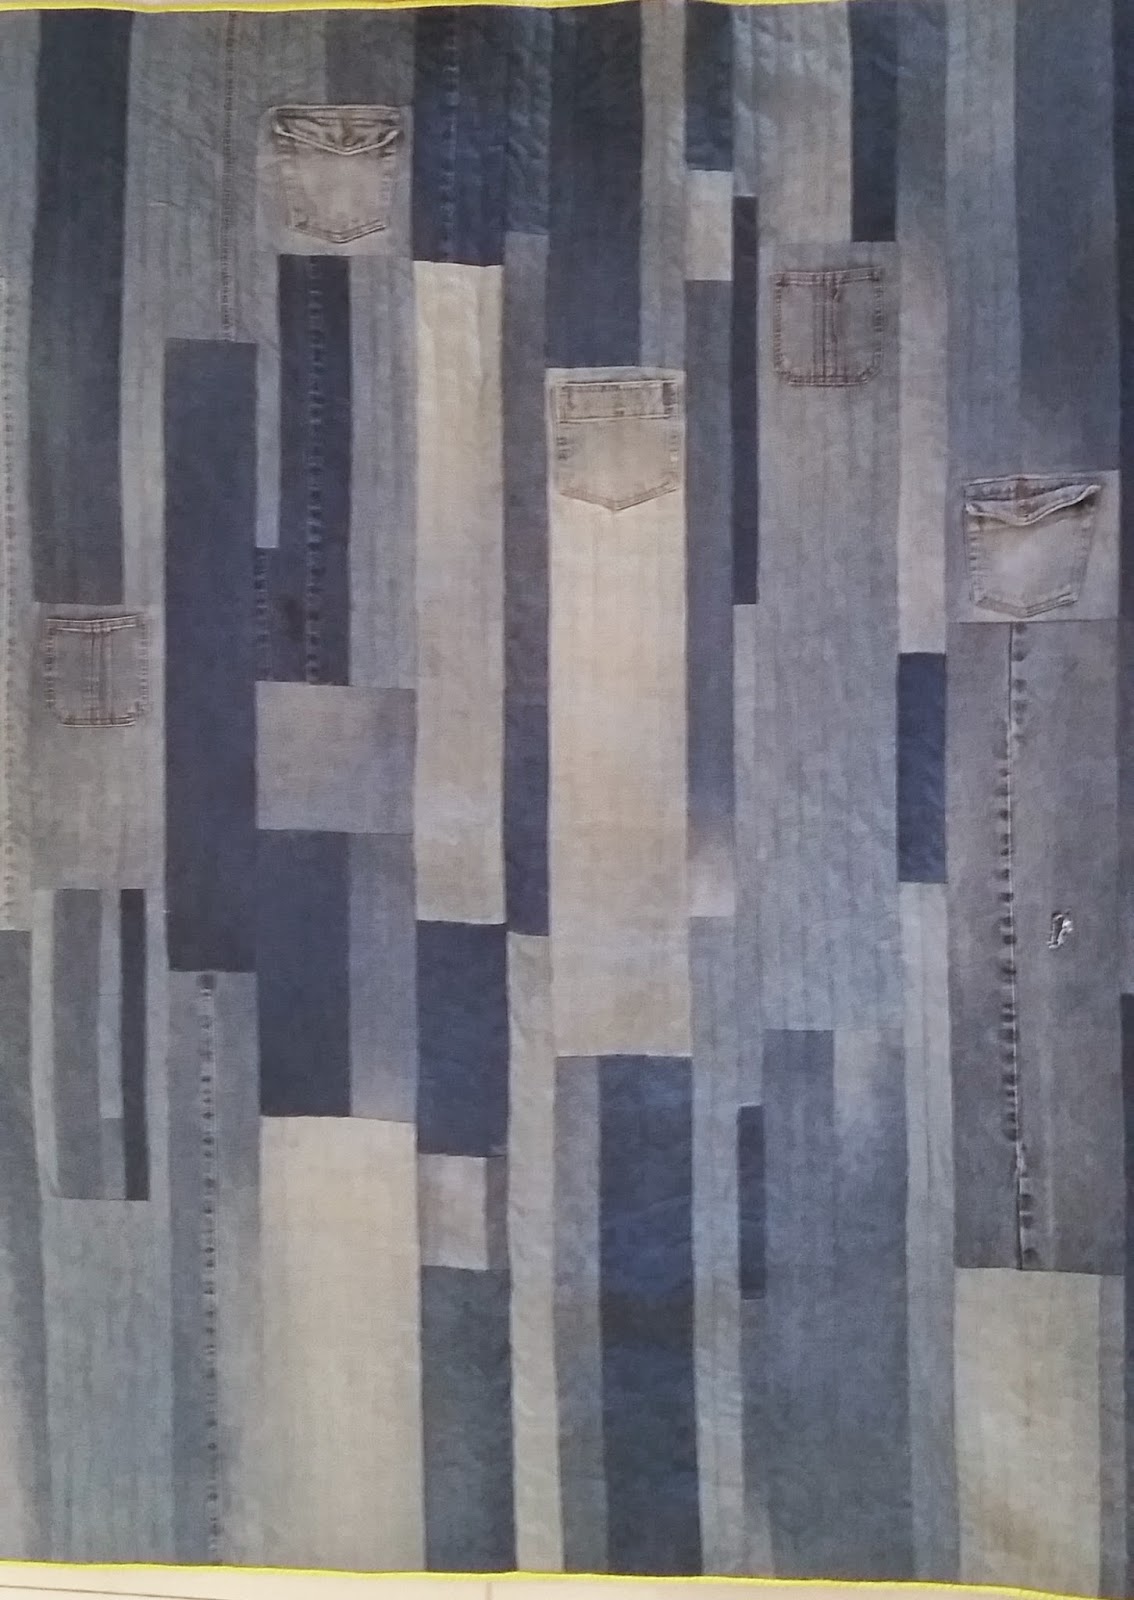
My Second Denim Quilt - A finished project

Welcome!

After making the denim quilt for hubby, I blogged about it here, I knew I wanted to try another.  Something a little more traditional, yet still a little querky.


Denim Strip Quilt

So here is it is!  It still has pockets to hide things in, and is also made from those old jeans (and a skirt) that were past their use by date, the ones that can only be sent to landfill.


After the first learning experience I ensured I had a nice flat surface to work with.

I don't have any progress pictures but I will briefly outline how I did this so that you can make one too.

After gathering some old pairs of jeans I started by cutting strips, as long as possible, with varying widths: 1.5, 2.5, 3.5, 4.5, 5.5 and 6.5 inches.


I cut the wider strips first and incorporated the pockets, As you can see in the picture above I also cut strips that included the seams in the jeans.

I kept all of the pockets the same way around and toward one end of the quilt - my theory was that if it was a cold night and I needed the remote and a snack nearby I needed to be able to reach the pockets!


I then started sewing strips together, narrower strips to match the width of wider strips and then length wise to make the length of the quilt I wanted.  Some of the pieced strips from top to bottom stay narrow whilst others create wider strips.

As I completed each strip I lay them out to ensure even colour dispersion and that the horizontal seams didn't all sit together. 
The above picture shows the quilt top before trimming.  I sewed each strip by squaring off one end of the quilt first and leaving the other end to be trimmed.


To finish this quilt I backed it with a gorgeous soft minky, used a 100% bamboo batting and quilted 1 inch lines.  To ensure all the pockets are still functional the quilting lines stop and start on either side of the pocket.

I bound it with a bright lime zig zag print which I think contrasts nicely.  It is however, the first and only time I have attempted machine binding - I usually do it by hand - and it is far from perfect hence no close ups there!

This has been finished for a while and was used regularly to snuggle under during the winter months - that minky is so soft and cuddly!

Thank you for popping by
Vicki

Saturday 13 December 2014

I've opened an Etsy shop!

Good Morning All

With a mounting pile of beautiful pillow cases and quilts that really are not going to be used when there are only 2 of us here, I have decided to give others the opportunity to enjoy them.


SO, I have created an Etsy Shop and listed some items, so far:

3 crocheted pillow cases:


The berry checkerboard quilt:

4 x quilted pillow cases:


And my latest finish, the Spring Carnival EPP Cushion


They can be found in my new Etsy Store; 'Vicki Isaacs Sews'.

It took some time to decide that I was happy with selling my items where others could be critical of what I have completed, and of course deciding on a price that reflected the handmade nature of the items yet didn't make them un-purchasable.  I'm not going to go into the ins and outs of pricing - there are plenty of other blog posts out there that do that!  

Thank you for popping by and sharing my latest step in this great quilting endeavour,

Vicki


Saturday 6 December 2014

Crochet Edged Pillowcases - A Finished Project

Vicki Crochets too!!


After the quilted pillowcases I blogged about here  I went for a change of pace and made some simple pillowcases with some pretty fabrics I had to hand and set about adding some embellishments:


The first has this beautiful purple floral fabric on the front with a coordinating lilac tone on tone print on the back, it is finished with a green scalloped edge which highlights the green in the print.

I enjoyed the change of pace, sitting and relaxing with a crochet hook.


The second has a simple blue and green floral on the front with a tone on tone green for the backing.  This is finished with a matching blue scallop.

I haven't picked up a crochet hook for a while and trying to remember some patterns for the crochet border to make each different was the most taxing part of this project!


Finally a beautiful blue with orange and pink flowers with a coordinating orange baking and a simple cream wave for the crochet.


All of the fabrics have small simple  prints, are reversible and will add a pop of colour to any bed.


All materials used - fabric, thread and crochet yarn are 100% cotton.

I can't wait to see some of these being used!

I''ve linked this post to the following linky parties:

Thank you for popping by,
Vicki


Wednesday 3 December 2014

English Paper Pieced Cushion Finish

Welcome,

I have finally finished this English Paper Pieced (EPP) cushion.


Finished Spring Carnival EPP Cushion
For those that don't know, EPP is a hand piecing method originating in England where the fabric is wrapped around pieces of paper to hold the shape for piecing.  I find this a great way to relax in front of the TV in the evenings.


 I believe the pattern is called spring carnival and is made up of squares and triangles around a central hexagon.
All pieces in this cushion have sides 2 inches in length, bigger than previous projects I have completed.  


I found these beautiful wellington boot/ gum boot fabrics which are the star in this cushion and have been paired with coordinating tone on tone floral fabrics in green, blue and pink.


I have backed the top with muslin and used a 100% bamboo batting before quilting with simple straight lines following the squares of the design.


I backed the cushion with the green fabric and inserted a hidden zipper.

I love it and can't wait to make some more using this pattern.


Thank you for popping by,

Vicki

EDIT: I have linked with the following linky parties:
- My Quilt Infatuation
- Quilt Story
- Blossom Heart Quilts
- Stitch by Stitch
- Freemotion by the River
All links can be found in the bar on the right